

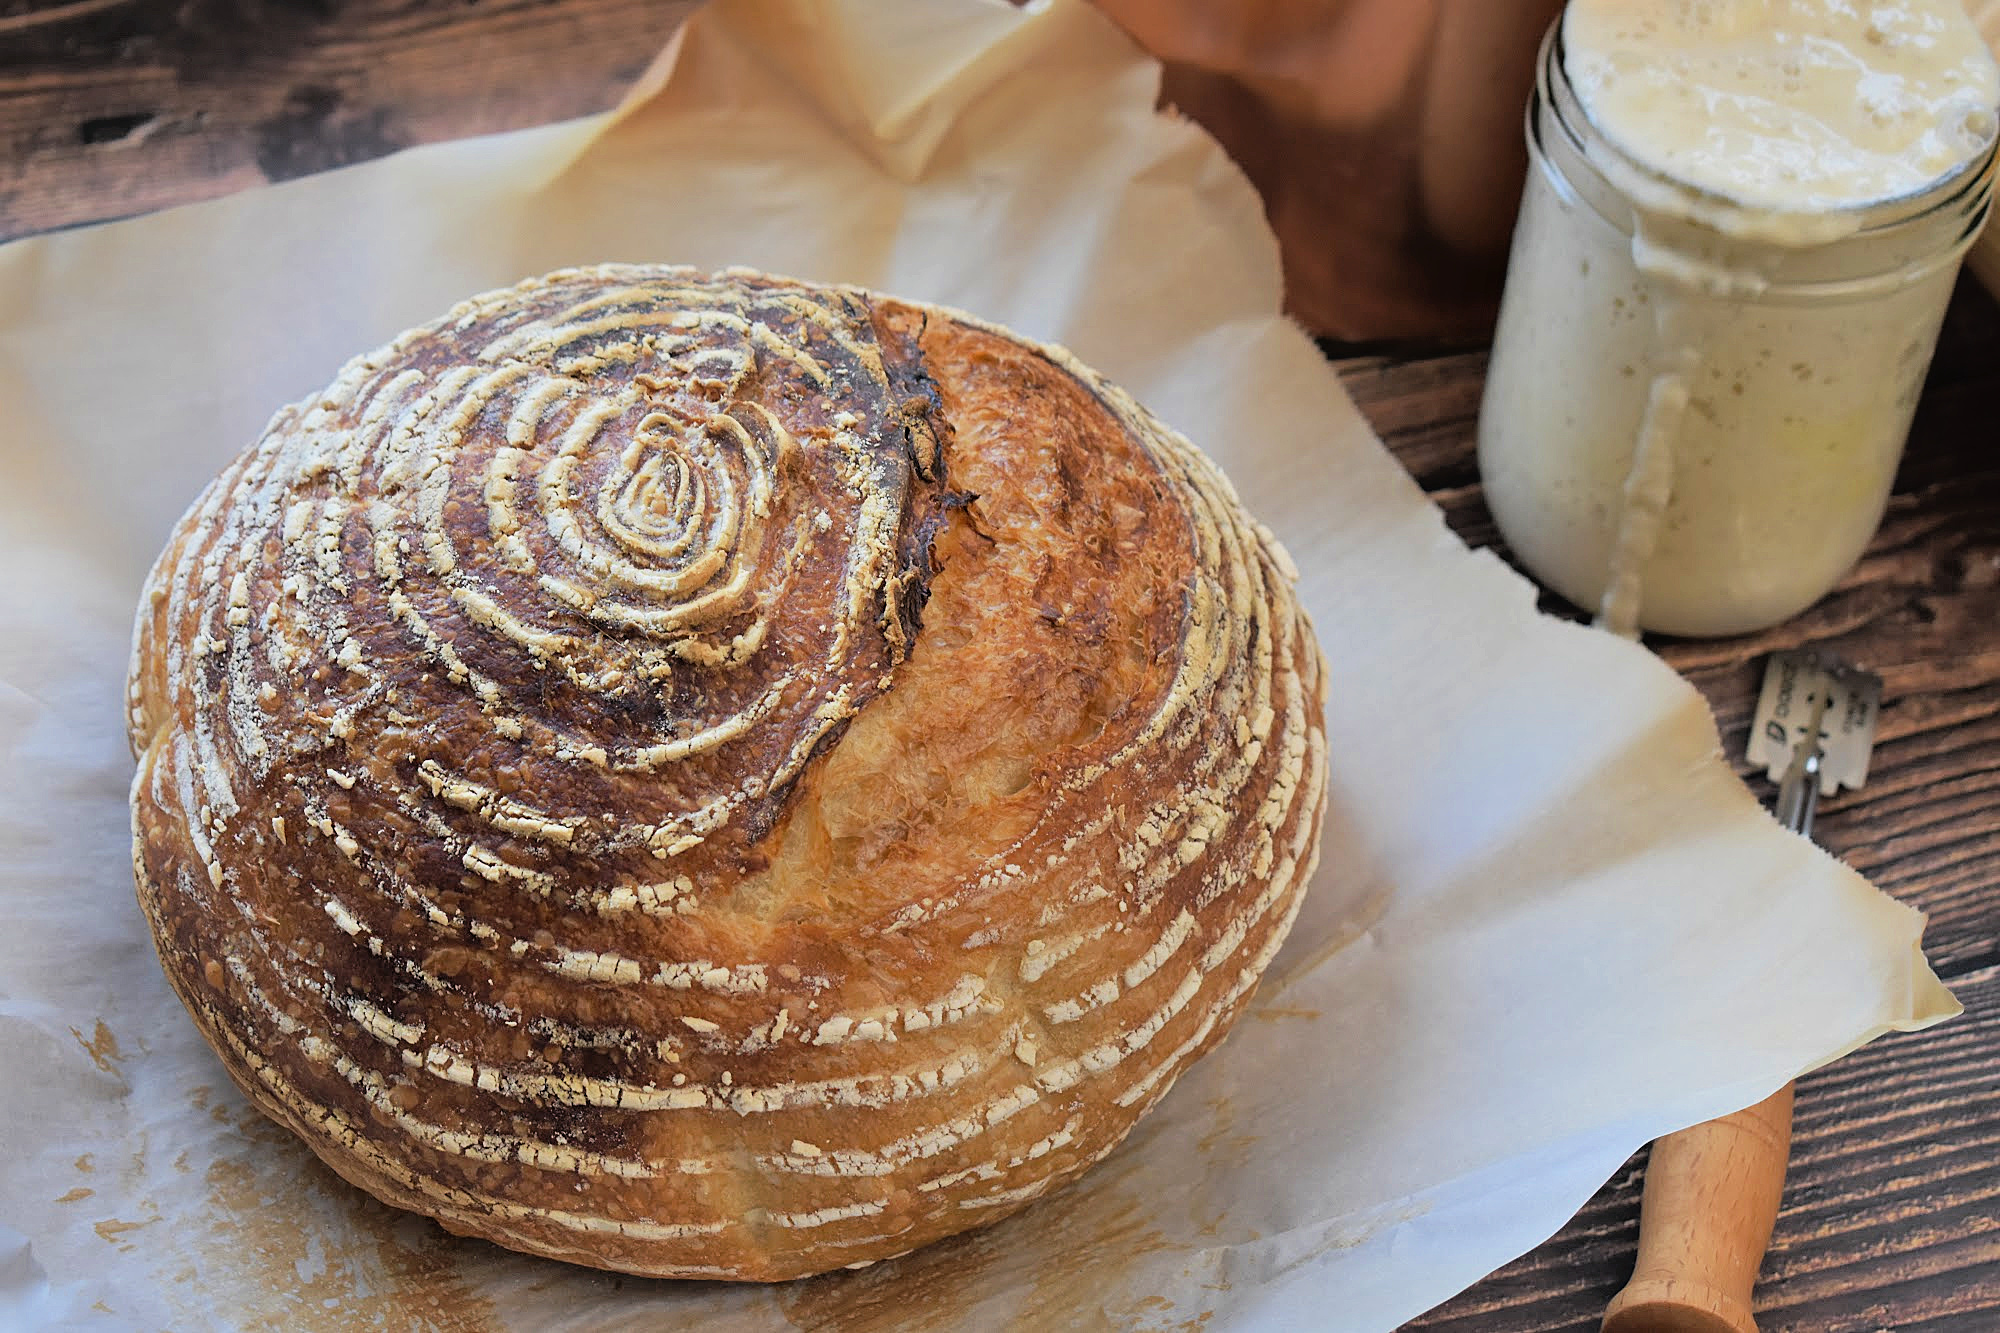
 Homemade sourdough bread has experienced a major revival in recent years, and for good reason! During the commercial yeast shortage of 2020, many people discovered they could bake bread without store-bought yeast by using a homemade sourdough starter instead. But what began as a necessity quickly became a passion.
This easy beginner sourdough bread recipe uses wild, natural yeasts and beneficial bacteria to ferment and leaven the dough. The slow fermentation process is what gives sourdough its signature tangy flavour, beautiful open crumb, and crisp crust. Many people also find sourdough easier to digest than conventional bread, and it tends to have a gentler effect on blood sugar levels thanks to the fermentation process.
Best of all? This recipe requires just four simple ingredients and absolutely no kneading.
If you’ve already made your own sourdough starter, this is the perfect first loaf to bake.
Why This Easy Beginner Sourdough Bread Recipe Works
This artisan-style boule looks impressive enough to rival a bakery loaf. It’s crusty on the outside, soft and chewy on the inside, but simple enough for a complete beginner to make.
There’s no stand mixer.
There’s no kneading.
There’s no complicated shaping.
The secret is time. But don’t worry: this recipe requires very little hands-on time. Most of the time is spent waiting for the dough to ferment and proof.
How to Make This Easy Beginner Sourdough Bread Recipe
Before you get started, you’ll need the following supplies:
- Active sourdough starter
- Large mixing bowl
- Mixing spoon
- Kitchen scale
- Clean tea towel, plastic wrap or beeswax wrap
- Bench scraper and/or bowl scraper
- Banneton or proofing basket (can also use a colander or medium-sized bowl lined with a floured tea towel in a pinch)
- Dutch oven
- Parchment paper
- Bread lame, razor blade or very sharp knife (for scoring)
- Cooling rack (optional but recommended for best results)
You can also get most of the sourdough tools you need all in one with this sourdough bread kit.
Step 1: Feed Your Starter
About 4–12 hours before mixing your dough, feed your sourdough starter so it’s active and bubbly. I like to feed my starter the night before and mix my dough in the morning.
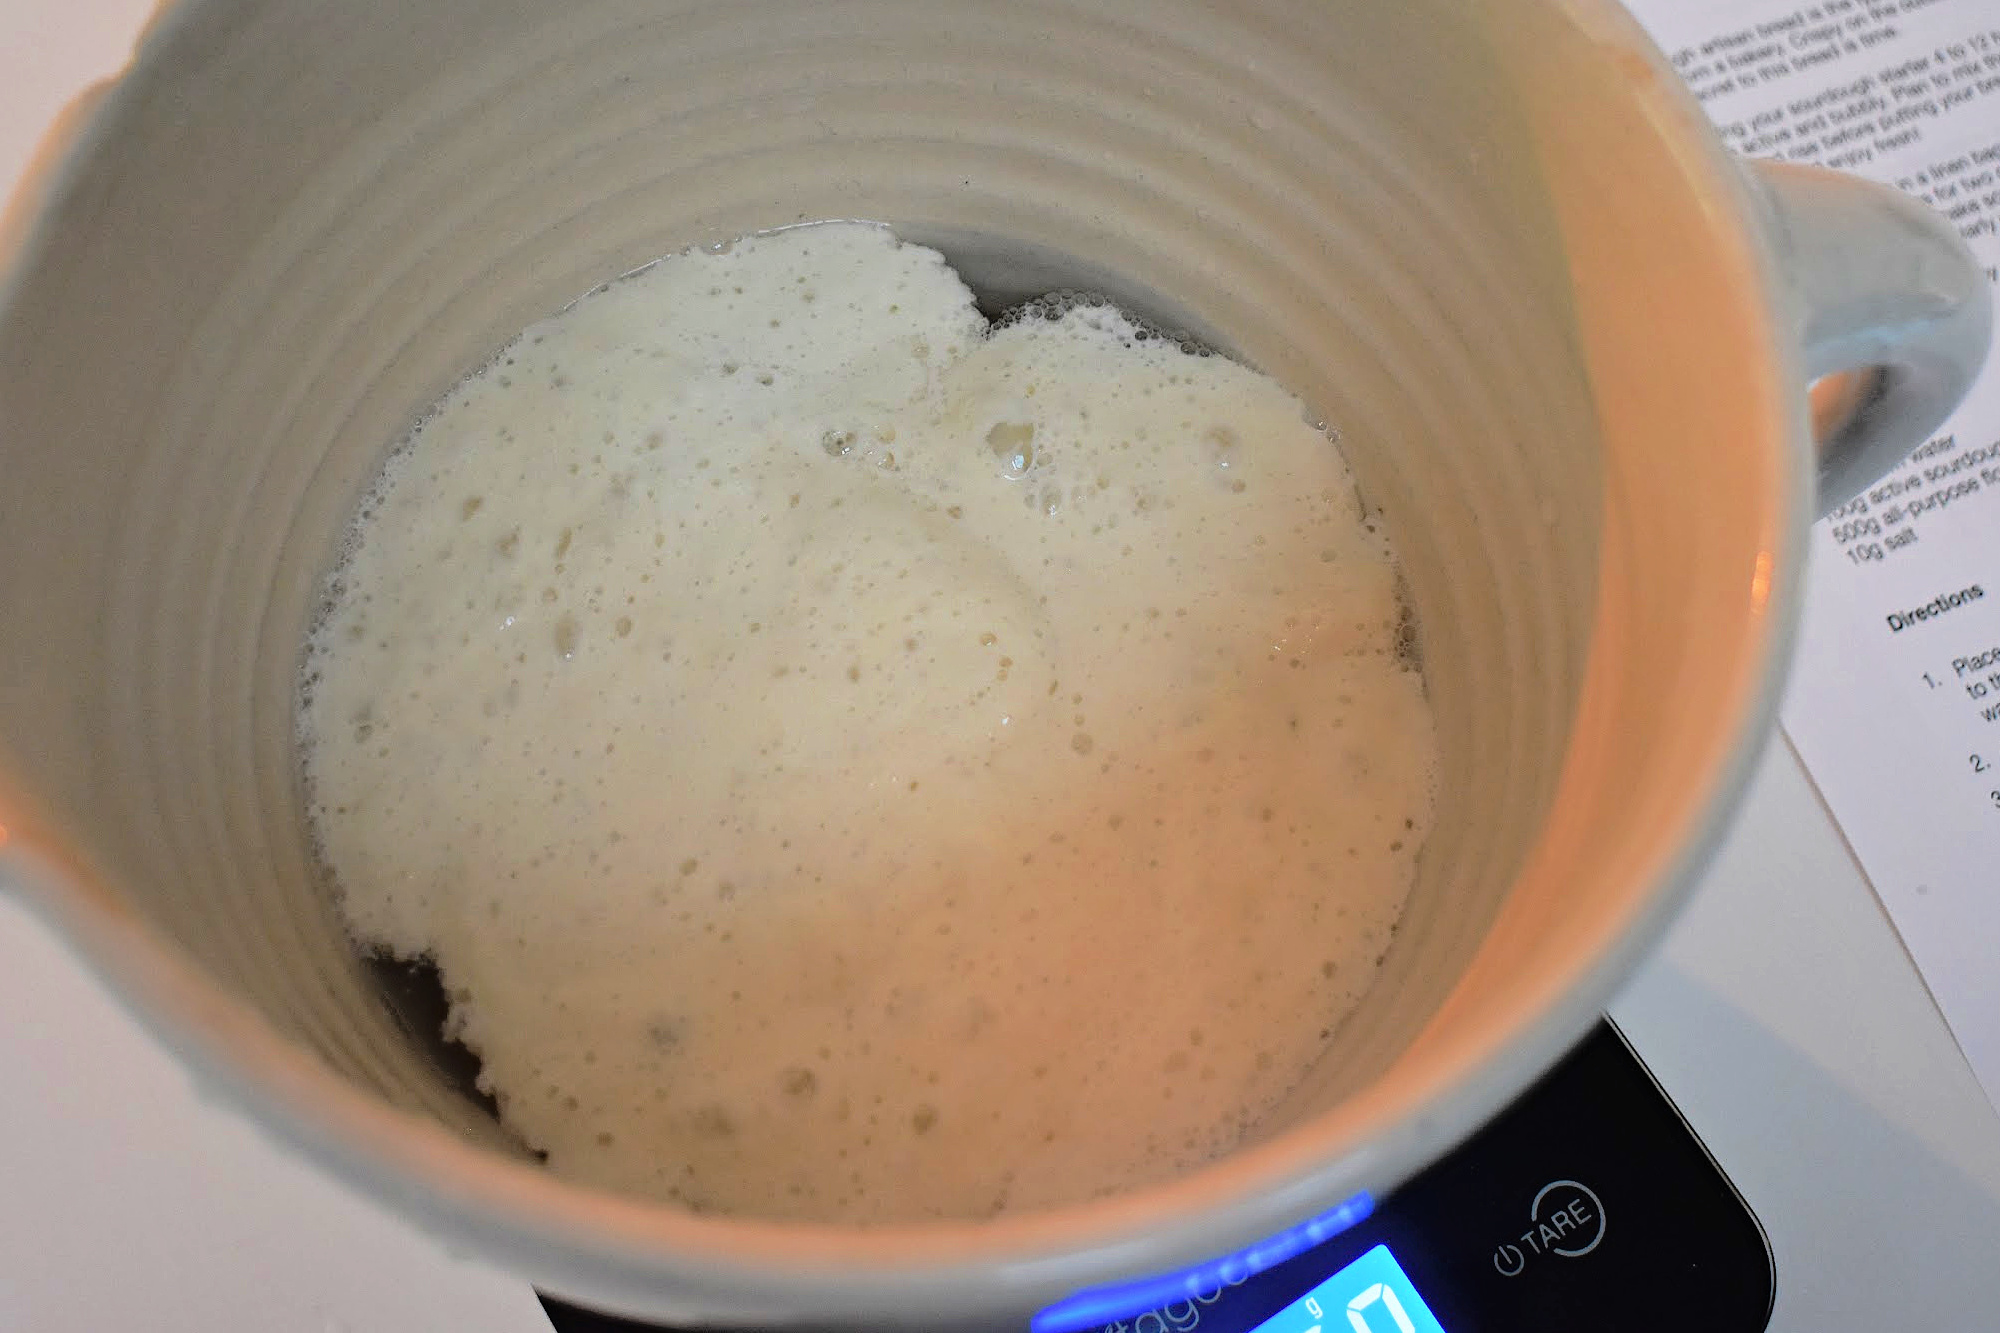
When you add your starter to warm water, it should float. This “float test” is a good sign your starter is ready to bake with.
Step 2: Mix the Dough (Autolyse Stage)
Place your mixing bowl on a kitchen scale and tare it to zero. Then add:
-
350g warm (not hot) water
-
100g active sourdough starter
-
500g all-purpose flour
-
10g salt
Mix until all the flour is incorporated. The dough will look shaggy, which is completely normal!
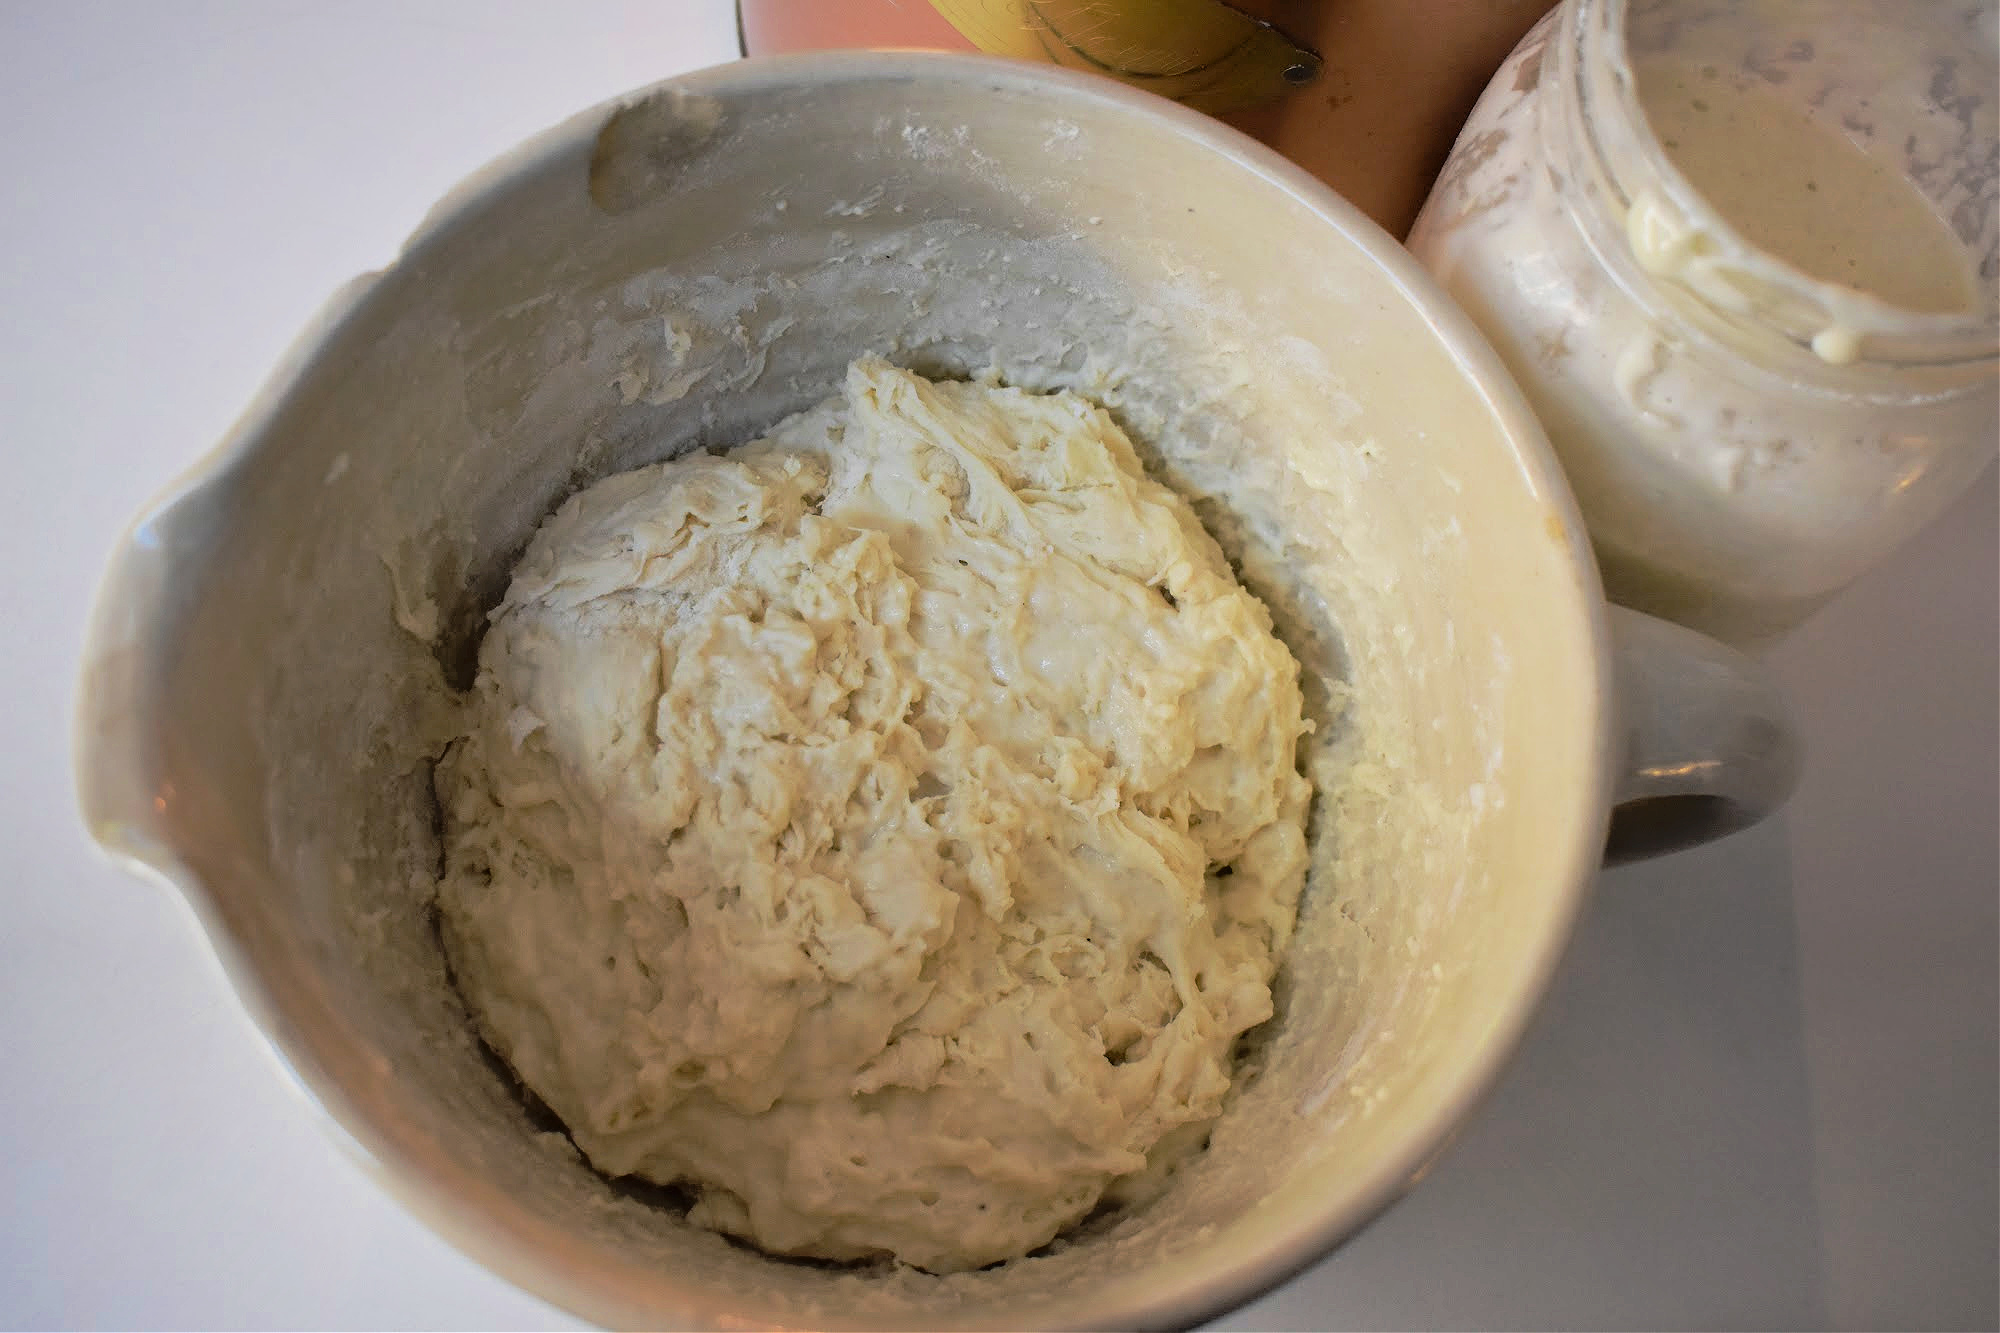
Cover the bowl and let it rest for 30 minutes. This rest period is called the autolyse. During this time, the flour hydrates fully and gluten development begins naturally.
Step 3: Stretch and Folds
Instead of kneading, this easy beginner sourdough bread recipe uses stretch and folds.
After the initial 30-minute rest:
1. Gently grab one side of the dough and stretch it upward.
2. Fold it over onto itself.
3. Rotate the bowl ¼ turn and repeat.
Do four stretches per set and repeat this process every 30 minutes for 2 hours, completing 5 total sets of stretch and folds over about 2.5 hours.
With each set, you’ll notice the dough becoming smoother and stronger.
Step 4: Bulk Fermentation
After the final stretch and fold, cover the bowl and let the dough rise at room temperature for 6–12 hours.
The dough should roughly double in size. Fermentation time will vary depending on your kitchen temperature. Warmer kitchens ferment faster, whereas cooler kitchens take longer.
Signs bulk fermentation is complete:
-
Dough has doubled
-
Surface looks slightly domed
-
Small bubbles visible
-
Dough jiggles slightly when moved
Step 5: Shape and Bench Rest
Turn the dough onto a lightly floured surface.
Shape it into a tight round using your hands and an optional bench scraper. Gently pull the outer edges underneath to create surface tension, but don’t overwork it!

Let the shaped dough rest on the counter for 30 minutes (this is called a bench rest).
Step 6: Proof
Transfer the dough into a well-floured banneton (or a bowl lined with a floured tea towel).
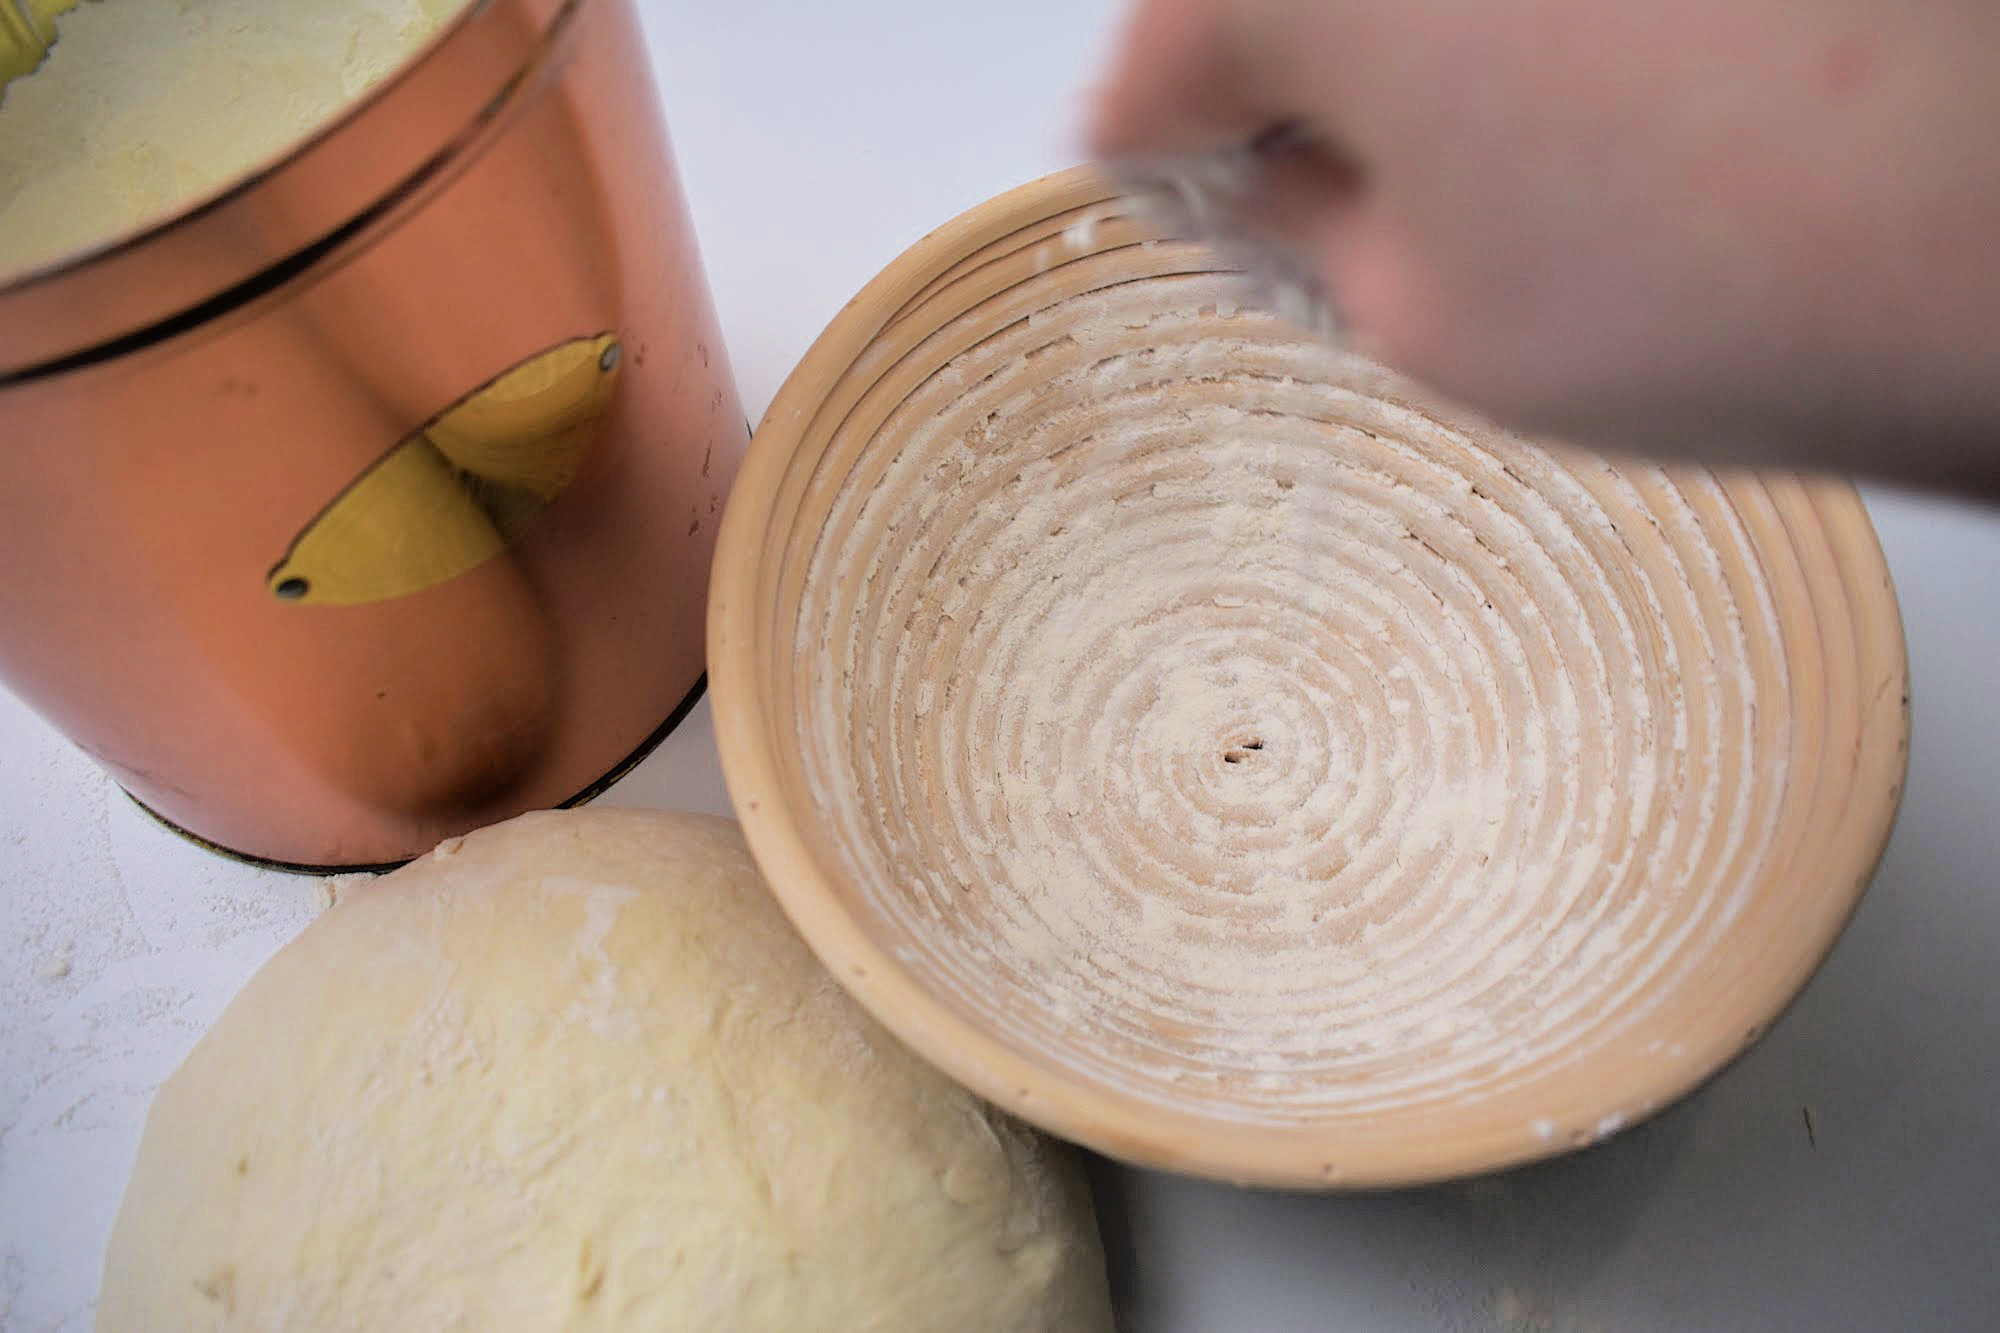

Cover the banneton and allow the dough to proof at room temperature for 3 to 4 hours if you plan on baking your loaf the same day. Otherwise, refrigerate for 12 hours (overnight) before baking. This cold fermentation improves flavour and helps the dough hold its shape.
Step 7: Preheat the Dutch Oven
When you’re ready to bake, preheat your oven to 500°F (260°C) with your Dutch oven inside.
Preheating the Dutch oven is crucial as it creates steam when the dough is added, which helps develop that beautiful crust and oven spring (the rapid burst of rising that bread dough experiences within the first 10–15 minutes of baking).
Step 8: Score and Bake
Turn the dough out onto parchment paper. Score the top using a bread lame or sharp knife. Make one deep slash to allow expansion, and optional decorative scoring if desired.
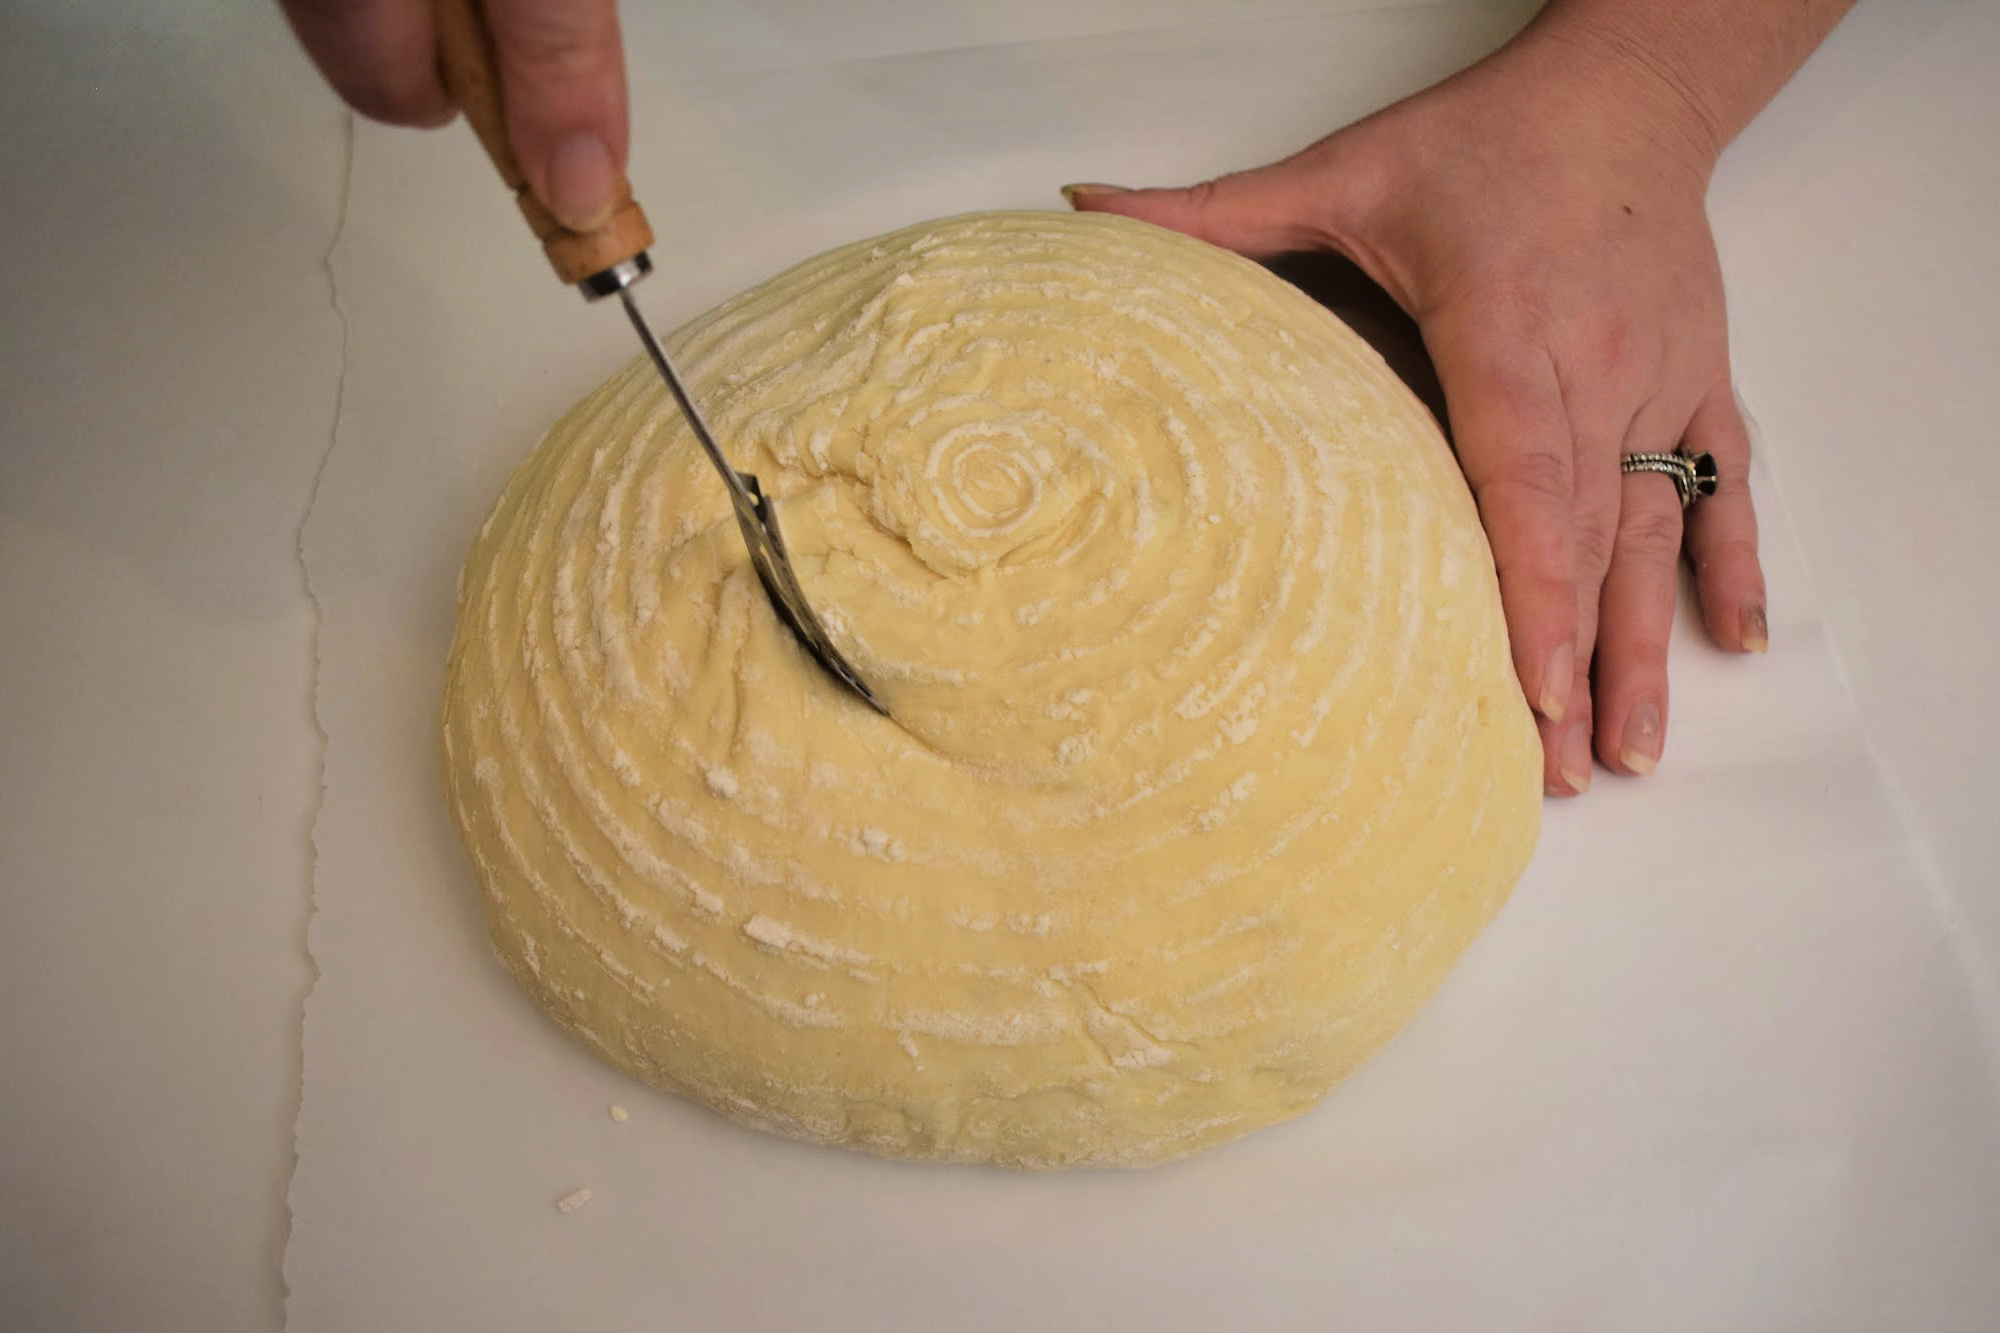
Carefully transfer the parchment and dough into the hot Dutch oven.

Bake:
-
20 minutes with the lid on at 500°F
-
Reduce to 475°F (246°C)
-
Remove lid and bake 20–25 more minutes
The crust should be deep golden brown.
Step 9: Cool Completely (Important!)
Transfer your bread to a cooling rack and allow it to cool completely before slicing. Cutting too early can result in a gummy interior because the crumb is still setting.
And voilà! You’ve just made a beautiful loaf of artisan-style sourdough bread:)

How to Store Sourdough Bread
This easy beginner sourdough bread is best enjoyed fresh as after a couple days, it starts to get a bit too crusty and hard.
Store any leftovers in a linen bag at room temperature for 2–3 days. After that, turn it into croutons or breadcrumbs.
Unlike sandwich bread, artisan sourdough does not freeze particularly well and is best eaten within a few days.
A Note About Measuring Ingredients (Why Measuring by Weight Matters)
For consistent results, always measure sourdough ingredients by weight.
Sourdough starter and flour can vary greatly in density depending on hydration and packing. Using a digital kitchen scale ensures accuracy and repeatability, which is especially important for beginners learning how dough should feel.
Troubleshooting Beginner Sourdough
Dense loaf?
Your starter may not have been active enough.
Flat spread-out loaf?
Bulk fermentation may have gone too long.
Too sour?
Shorten the cold proof time slightly.
Remember: sourdough baking is a skill that improves with practice, but as with anything, the only way to really learn is to roll up your sleeves and get baking!
If your first few loaves aren’t perfect, keep practicing. Sourdough bread baking is a learning process, and you’ll get better and better at it as you go.
Happy baking!

Easy Beginner Sourdough Bread Recipe
This easy beginner sourdough bread recipe makes a crusty artisan-style boule with a chewy interior—no kneading required. Simple steps, impressive results, perfect for first-time sourdough bakers.
Ingredients
- 350g warm (but not hot) water
- 100g active sourdough starter
- 500g all-purpose flour
- 10g salt
Instructions
Mix Dough
- Place a large bowl on a kitchen scale and tare to zero. Add water and sourdough starter (starter should float). Add flour and salt; mix until fully combined and no dry flour remains. Dough will be shaggy at this stage.
- Cover the dough and let it rest and autolyse (hydrate) for 30 minutes.
Stretch & Fold
- Perform 4 stretch-and-folds, turning the bowl ¼ turn (90º) between each. Cover and rest 30 minutes. Repeat every 30 minutes for 2 hours total (5 sets of 4 stretch-and-folds).
Bulk Ferment
- Cover the dough and let it rise (bulk ferment) at room temperature 6–12 hours, or until doubled in size.
Shape
- Turn dough onto a lightly floured surface and shape into a round. Let it rest for 30 minutes.
- Place dough in a floured banneton (or towel-lined bowl). Cover and let the dough proof (rise) for another 3 to 4 hours at room temperature if you're planning on baking your loaf the same day. Otherwise, place the covered banneton with the dough in the fridge and refrigerate 12 hours (overnight).*
Bake
- Preheat oven to 500°F (260°C) with a Dutch oven inside.
- Turn dough onto parchment paper. Lightly flour and score with a lame (one deep slash plus optional decorative cuts).
- Transfer dough (on parchment) to hot Dutch oven. Cover and bake 20 minutes.
- Reduce heat to 475°F (246°C). Remove lid and bake 20–25 minutes, until deep golden brown.
- Transfer to a cooling rack and cool completely before slicing.
Notes
* Allowing your dough to rise in the fridge overnight, helps to develop a more complex flavour, makes the dough easier to score, and helps it hold its shape. This "cold proofing" process is recommended if you have time, but feel free to skip this step and simply allow your dough to rise at room temperature for 3 to 4 hours if you want to bake it the same day.






0 Comments