


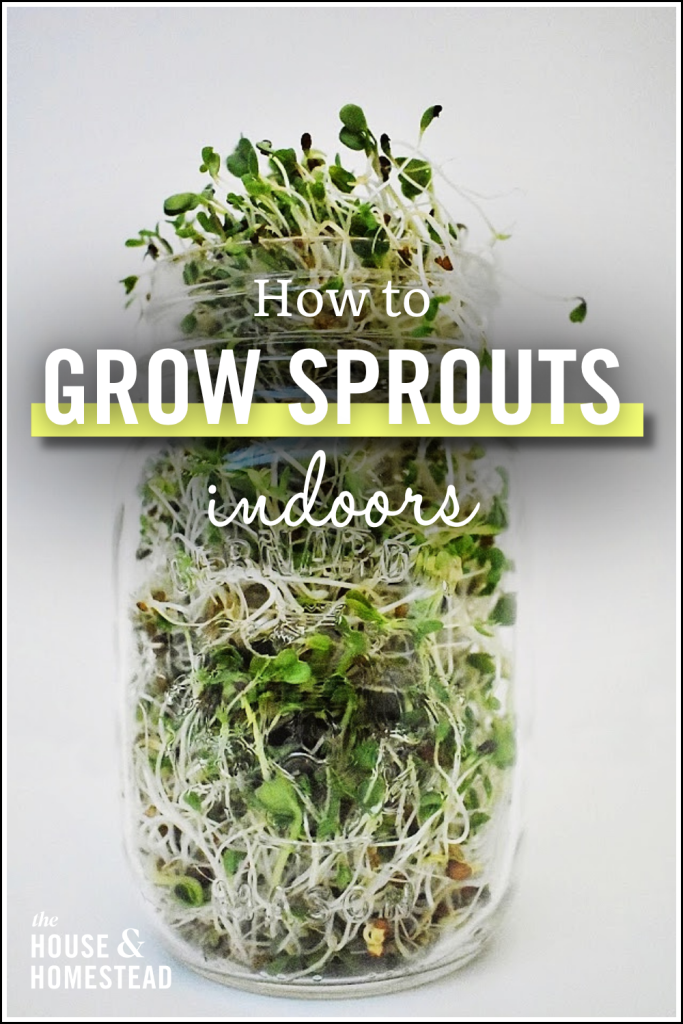
 Sprouts are considered to be a nutrient-dense superfood. Learn how to grow fresh sprouts indoors and add these homegrown greens to your diet all year long!
***
When I first started growing my own food at home, the gardening world seemed pretty black and white to me: plants grow in the dirt, outdoors, in the spring and summer. That’s what us city kids always learned in school anyway.
And obviously that’s not wrong, but once you get into gardening and growing food, a world full of endless possibilities starts to open up, including growing food indoors year-round.
But growing indoors can often conjure images of expensive lights, complicated hydroponics systems, converting your guest bedroom into an indoor garden and maybe even getting a visit from the police who got a call from your neighbour on the suspicion you’ve started a grow-op and are secretly part of a murderous gang. And let’s be honest, none of that sounds fun.
Thankfully, growing food indoors doesn’t require any of the above and it doesn’t have to be nearly as complicated or stressful as you might think. In fact, you can grow highly nutritious fresh sprouts using nothing more than glass Mason jars or a seed-starting tray on your kitchen counter, and you can grow them all year long!
What Are Sprouts?
Sprouts are exactly what they sound like: They’re sprouted seeds.
To break it down a little more, sprouts are seeds that have germinated and sprouted, but that haven’t grown into seedlings yet. They’re basically newborn plants.
If you think of full-grown plants as adults, and seedlings as babies and kids, seed sprouts are more like infant plants who have just hatched into the world. So sprouts are simply seeds that have been soaked and allowed to germinate, and are then harvested (aka. eaten) in the sprouting stage rather than being allowed to grow into full-grown plants.
The Nutritional Benefits of Sprouts
Sprouts are considered to be a superfood because of how nutrient dense they are. Because sprouts are infant plants, they’re packed full of nutrients that they need to grow into healthy, full-grown plants, and when we eat them, we get all of that nutritional value and health benefits for our own bodies.
Sprouts are also considered to be a highly nutritious food because they’re tiny but packed with nutrients, and because they’re so tiny, you can eat LOTS of them at once and therefore consume way more nutrients than if you were eating their full-grown counterparts. They’re also considered to be more nutritious than seeds because they’re a living food (as opposed to unsprouted seeds) which makes the nutrients they contain active and more bioavailable. In other words, the nutrients they contain are easier for our bodies to absorb.
They’re also very low in calories, so while sprouts alone won’t get you through a long, cold winter, they’re an excellent option for anyone looking to lower their calorie intake while upping their nutrient-consumption (and I’d venture to say that’s most people in the western world nowadays). PLUS, adding fresh sprouts to pantry meals full of calorie and carbohydrate-dense grains and preserved fruits and vegetables throughout the winter will help give you complete nutrition all year long without having to step foot in a grocery store!
Other Benefits of Growing Sprouts Indoors
Homegrown sprouts are incredibly quick and easy to grow indoors and are super cost-efficient too. A pack of sprouting seeds usually costs anywhere from about $2 to $10 (depending on the type of seed) and stretches quite a long way. On average, 1/4 cup of seeds is all you need to grow enough sprouts to divide up generously between a family of four or five.
To grow your own fresh sprouts, all you need is a Mason jar and a piece of mesh screen or a sprouting lid. Or you can invest a nominal amount in some sprouting trays (my preferred way to grow sprouts) and stack them on your kitchen counter to save space and grow even more.
To sprout the seeds, all you need is a little water. Because they’re harvested before they even become seedlings, you do not need any fancy overhead lights or even soil. Sprouts will grow indoors at any time of year, and typically take just a few days until they’re ready to harvest and eat.

Most Common Sprouting Seeds
While you can technically sprout just about any type of seed, nut or bean/legume, the most common seeds to sprout and eat are:
- Mung beans
- Lentils
- Alfalfa
- Clover
- Radish
- Broccoli
- Sunflower
- Peas
Some seeds can be dangerous to sprout and eat raw. Kidney beans and tomato seeds are two examples of seeds that produce toxins when sprouted. Always stick to using designated sprouting seeds.

Using Mason Jars vs. Sprouting Trays to Grow Sprouts
There are two main ways to grow sprouts indoors…
- In glass Mason jars (or any glass jars)
- In sprouting trays
There are pros and cons to each method. Mason jars are great because you probably have some on hand already at no extra cost, and if you’re only growing one or two types of sprouts, they take up very little space on your kitchen counter.
Sprouting trays are something you’ll probably need to purchase (albeit only once), but they allow you to grow more sprouts and allow for more airflow and surface space. This helps prevent the sprouts from going musty or even moldy, and prevents harmful bacteria from forming (which can happen if sprouts are not properly rinsed regularly and and left to stagnate).
The other nice thing about using sprouting trays is that you can stack them on top of one another and grow a few different kinds of sprouts at once without taking up any additional counter space. I use this sprouting kit *INSERT LINK*, which allows me to grow up to three different types of sprouts at once in under one square foot of space. Sprouting trays are my preferred method, but in the end, the choice is yours and either way will work just fine.
How to Grow Sprouts Indoors
You’ll need to start by soaking seeds for at least 8 to 12 hours. Whether you plan to grow your sprouts in jars or trays, you’ll want to soak them in a jar to start out.
1. Scoop a small amount of seeds into a Mason jar (one or two tablespoons if growing in a Mason jar, up to 1/4 cup if growing in a tray) and cover with water. Cover the top of the jar with a piece of fine mesh or a sprouting lid and let soak for 8 to 12 hours. (I let mine soak overnight).
2. In the morning, or after the seeds have gone through the initial soaking period, strain out the water through the mesh or sprouting lid.
3. Give the seeds a good rinse and strain once more.
* (If you don’t have a piece of fine mesh or a sprouting lid, you can simply strain seeds through a fine mesh strainer and return them to the jar or transfer them to a sprouting tray. You can use cheesecloth but sprouts tend to stick to the cheesecloth when you strain them so this method is a bit more cumbersome.)
4. At this point, if you’re using a Mason jar for the entire process, leave the rinsed, strained sprouts in the jar and tip the jar at a slight angle so that excess water can drain off and air can flow in. An easy way to do this is to place the jar at an angle in a bowl, but you could also place it in a dish rack if you have one.
5. If using a sprouting tray, transfer seeds to the sprouting tray instead. The sprouting tray has small holes in the bottom that naturally allow water to drain and air to flow in. Each tray sits on top of another tray which prevents any excess water from draining onto your counter.
6. Rinse sprouts once in the morning and again in the evening. Rinsing them helps to keep them moist and prevents them from sitting in stagnant water. Continue doing this until sprouts are ready to harvest and eat (usually within 2 to 6 days)
7. When sprouts are ready to harvest, rinse one more time under cold water and strain well. (I like to lay mine out on a paper towel to soak up excess moisture). Either eat right away, or transfer to a container or bag and store sprouts in the fridge for up to one week.

Ways to Use Sprouts
Homegrown sprouts make an excellent healthy addition to salads, sandwiches, soups, stir-fries and smoothies. Try adding alfalfa sprouts (or this 3 salad mix) to sandwiches or pita shells along with some deli meat and/or fresh sliced tomatoes and avocados.
Top your next salad with a few radish sprouts to add some spicy flavour. Radish sprouts, like all sprouts, tend to taste very similar to their full-grown counterparts, so radish sprouts pack the same spicy kick! Use sprouted beans in place of regular soaked beans in bean salad for added nutrition.
You can even use sprouted beans to make sprouted bean chilli! (Apparently the sprouted beans are easier to digest). Add bean sprouts to stir fries or Asian dishes. Use lentils to make sprouted lentil curry, or sprouted green peas to make sprouted green pea dip. Add sprouted wheat grass to smoothies or grind dried sprouted wheat berries to make super nutritious homemade bread!
You can use fresh sprouts in place of their regular seed or full-grown counterparts in just about any recipe. The options are pretty much endless! So not only is growing sprouts a great way to grow fresh food indoors year-round, it’s a fantastic way to expand you repertoire of healthy homemade recipes too!
Where to Buy Sprouting Kits and Seeds
My favourite place to purchase sprouts and sprouting accessories is from True Leaf Market (affiliate link). This is where I got my sprouting kit from that I use all the time.
You can also purchase sprouting jar kits and sprouting lids, as well as sampler packs of multiple different seeds or packs of individual seeds like alfalfa seeds or lentil seeds, or seed mixes like sandwich mix or bean salad mix.
I’ve also found a much smaller assortment of sprouting seeds from my local garden supply store, but I’ve found that ordering sprouts online has given me the best variety and value for money.
Have you ever grown sprouts before? If so, what’s your favourite way to enjoy them? Let me know down below:)
Wishing you homemade, homegrown, homestead happiness 🙂

Wanna learn how to grow your own food?
Let’s face it: food costs are skyrocketing and only continuing to go up. Growing your own food is basically like printing your own money! Not to mention how much healthier and better-tasting it is. And you might be surprised by just how much food you can grow in a relatively small space.
But if you’re new to gardening, it can feel intimidating to get started. I know, because I was once a beginner who had NO CLUE what I was doing—and I made plenty of mistakes that cost me both time and money along the way.
Over the past 10+ years, I’ve learned how to feed my family from our backyard (well… front yard, actually!) on our modest quarter-acre property. Today, I grow hundreds of pounds of food for our family every year for practically free. Yes, there are some startup costs—but they pay big dividends for years to come. Investing in a garden is just about the smartest investment you can make nowadays!
If you’re ready to make that investment in your family’s food security, I’d love to invite you to join me inside my signature program, Seed-to-Soil.
Inside the course, I’ll teach you step-by-step exactly how to grow your own food from seed and create your very own organic grocery store right in your backyard. From choosing the right seeds and starting them successfully, to planting, harvesting, and even saving seeds for the following season, you’ll learn the simple, proven system I’ve used to grow abundant food year after year.
If you’re ready to stop relying entirely on the grocery store and start growing real food for your family, click here to enroll in Seed-to-Soil today.
I can’t wait to see you inside:)





I’m interested in growing my own indoor sprouts, but I’m not sure where to begin. Could you provide some guidance on the basics of indoor sprout cultivation and any tips for a successful, homegrown sprout harvest?
Hi there – if you scroll down to the part of the article that is titled “How To Grow Sprouts Indoors”, it walks you through the process pretty clearly! Let us know if you have any further questions. -Ashley (Assistant)
How long will sprouts last as you are cutting and eating them?
Hi Robyn,
I think you may be confusing sprouts with microgreens. Sprouts are simply sprouted seeds and do not need to be cut.
As noted in the article you rinse them for 2-6 days until ready to harvest, and then rinse one more time under cold water and strain well (I like to lay mine out on a paper towel to soak up excess moisture). Either eat right away or transfer to a container or bag and store in the fridge for up to one week.
I have a similar sprouting kit. I like it because it is much more hands off than the jar route. It also ‘feels’ safer to me. Because the seeds/sprouts don’t ‘sit’ in the water and the kit offers better airflow I feel there is less opportunity for mold/bacterial growth.
Sorry for the loss of your beloved pet.
Yes I feel the same way. I find they go musty in the jar sometimes so I prefer the trays. But a jar works in a pinch:)
Thanks for the condolences. He lived a good long life.
So helpful to me! I will take time to try it!
🙂